Dry rot, caused by the fungus Serpula lacrymans, is a silent destroyer of wooden structures, thriving in damp, poorly ventilated areas. While painting your Washington home can enhance its aesthetic and protective qualities, the process can inadvertently create conditions conducive to dry rot if not managed properly. Here’s a comprehensive guide to safeguarding your home from dry rot during painting, ensuring both beauty and structural integrity.
Understanding Dry Rot
Dry rot requires moisture (typically above 20%), warmth, oxygen, and a food source (wood) to grow. It spreads rapidly, producing a musty odor, brittle wood, and distinctive fungal growths like white mycelium or reddish-brown spores. Painting projects, especially exterior ones, can introduce or trap moisture in wood, creating a perfect environment for dry rot if precautions aren’t taken.
Pre-Painting Preparations
-
Inspect for Existing Damage
Before painting, thoroughly inspect wooden surfaces—siding, trim, window frames, and decks—for signs of dry rot. Look for cracked or discolored wood, soft or crumbly textures, or fungal growth. Use a screwdriver to probe suspect areas; if it sinks in easily, rot may be present. Address any issues before painting, as covering rot with paint will only mask the problem, allowing it to worsen. -
Repair and Replace Damaged Wood
Remove rotted wood completely, as partial removal can leave fungal spores behind. Replace with pressure-treated or naturally rot-resistant wood like cedar or redwood. For minor damage, use a wood hardener or epoxy filler after removing decayed material, but ensure the area is dry first. -
Improve Ventilation and Drainage
Ensure proper ventilation in areas prone to moisture, such as crawlspaces, attics, and under decks. Check that gutters and downspouts direct water away from the house. During painting, avoid sealing vents or blocking airflow, as trapped moisture can accelerate rot. -
Clean and Dry Surfaces
Clean all surfaces to be painted, removing dirt, mildew, and old paint with a pressure washer or scrub brush and mild detergent. Allow the wood to dry completely—typically 48-72 hours after cleaning or rain—before painting. Use a moisture meter to confirm wood moisture content is below 15%.
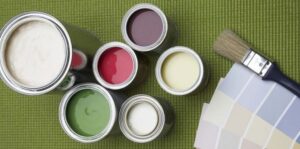
Choosing the Right Materials
-
Select High-Quality Primers and Paints
Use a high-quality, water-repellent primer designed for exterior wood to seal the surface and prevent moisture penetration. Oil-based or acrylic primers with mildew-resistant properties are ideal. For topcoats, choose 100% acrylic latex paints, which offer flexibility and breathability, reducing the risk of trapped moisture. -
Avoid Over-Sealing
While sealing wood is crucial, applying too many layers of non-breathable paint can trap moisture, fostering rot. Follow manufacturer guidelines on application thickness and drying times. For previously painted surfaces, consider stripping old paint if it’s peeling or cracking to avoid sealing in moisture. -
Use Caulk and Sealants Wisely
Apply silicone or polyurethane caulk to seal gaps around windows, doors, and joints, but ensure it’s applied to dry surfaces. Avoid over-caulking, as it can trap moisture if not properly cured. Check existing caulk for cracks and replace it before painting.
During the Painting Process
-
Time Your Project Right
Paint during dry, mild weather (50-85°F) with low humidity to ensure proper drying. Avoid painting late in the day when dew might settle, or during rainy seasons unless working under cover. Monitor weather forecasts to avoid sudden rain or temperature drops. -
Apply Thin, Even Coats
Thick paint layers dry slowly, increasing the risk of moisture retention. Apply thin, even coats, allowing each to dry fully (typically 4-24 hours, depending on the paint type and conditions). Sand lightly between coats to ensure adhesion and a smooth finish. -
Protect Against Water Exposure
If painting outdoors, use tarps or plastic sheeting to shield surfaces from unexpected rain, but ensure they don’t trap moisture against the wood. Remove coverings promptly after rain to allow airflow. For interior projects, avoid painting in high-humidity areas like bathrooms without proper ventilation.
Post-Painting Maintenance
-
Monitor for Moisture Issues
After painting, regularly inspect painted surfaces for signs of peeling, bubbling, or discoloration, which may indicate trapped moisture or early rot. Pay special attention to areas exposed to water, like window sills and baseboards. -
Maintain Ventilation
Ensure vents remain unblocked and fans are used in high-moisture areas. Consider installing a dehumidifier in basements or crawlspaces to keep humidity below 60%. -
Schedule Regular Upkeep
Repaint every 5-10 years, depending on climate and paint quality, to maintain the protective barrier. Clean painted surfaces annually to remove dirt and mildew, and re-caulk as needed to prevent water infiltration.
Professional Help
For large projects or suspected dry rot, consult a professional contractor. They can assess hidden damage, recommend treatments, and ensure proper repairs. If fungal growth is extensive, a mold remediation specialist may be needed to safely remove it.
Protecting your home from dry rot during the painting process requires vigilance, preparation, and the right materials. By addressing moisture issues, choosing breathable paints, and maintaining proper ventilation, you can enhance your home’s appearance while safeguarding its structural health. A well-executed painting project not only beautifies but also fortifies your home against the insidious threat of dry rot, ensuring long-term durability and peace of mind.